Install
Download Monarch
- macOS
- Windows
- Linux
Make sure you have Xcode installed.
Download the following bundle to get the latest release of the Monarch binaries, which include the Monarch CLI and desktop app.
cd ~/development
curl -O https://d148mrbia1nlbw.cloudfront.net/macos/monarch_macos_2.3.1.zip
Extract the file:
unzip monarch_macos_2.3.1.zip
Add the monarch binaries to your path:
export PATH="$PATH:`pwd`/monarch/bin"
This command sets your PATH variable for the current terminal window only. To permanently add Monarch to your path, see Update your path.
Make sure you have Visual Studio 2022 with the “Desktop development with C++” workload installed, including all of its default components. (Note: Visual Studio is different than Visual Studio Code).
Download the following bundle to get the latest release of the Monarch binaries, which include the Monarch CLI and desktop app.
Extract the file in the desired location, for example:
cd development
tar -x -f monarch_windows_2.3.1.zip
You can now run Monarch using the monarch.exe located in the monarch\bin directory. To permanently add Monarch to your path, see Update your path.
Monarch Linux works on Flutter 3.9 or above.
Monarch relies on Flutter desktop which has its own Linux requirements. To install those requirements run the following command:
sudo apt-get install clang cmake ninja-build pkg-config libgtk-3-dev liblzma-dev
For more details see Flutter additional Linux requirements.
Also install this requirement missing from the Flutter documentation:
sudo apt install lib32stdc++-12-dev
For more details see this Flutter documentation issue.
Download the following bundle to get the latest release of the Monarch binaries, which include the Monarch CLI and desktop app.
cd ~/development
curl -O https://d148mrbia1nlbw.cloudfront.net/linux/monarch_linux_2.3.1.tar.xz
Extract the file:
tar -xf monarch_linux_2.3.1.tar.xz
Add the monarch binaries to your path:
export PATH="$PATH:`pwd`/monarch/bin"
This command sets your PATH variable for the current terminal window only. To permanently add Monarch to your path, see Update your path.
Run: monarch init
Go to one of your Flutter projects. Then, inside your project’s root directory run:
monarch init
The monarch init command sets up the dependencies needed to run monarch.
It also creates a few sample stories in your project.
Run: monarch run
Inside your project’s root directory run:
monarch run
The monarch run command prepares the stories in your project so they can be
used by Monarch. It then launches the Monarch app where you can preview your
stories.
Write your own stories
You can write stories for the pieces of the user interface you want to isolate. Here is a simple story:
Widget foo() => MyWidget(...);
In Monarch, a story is a function which returns a Widget and which is inside a file that ends in _stories.dart.
It's that simple. Monarch will then preview the stories you have written.
The monarch init command generates the 3 samples stories below.
Widget primary() => const Button('...', ButtonStyles.primary);

Widget secondary() => const Button('...', ButtonStyles.secondary);

Widget disabled() => const Button('...', ButtonStyles.disabled);
Each story returns a button, which is a Widget, in a specific visual state. There is the primary, secondary and disabled states of the Button widget. When you run monarch you will preview these stories.
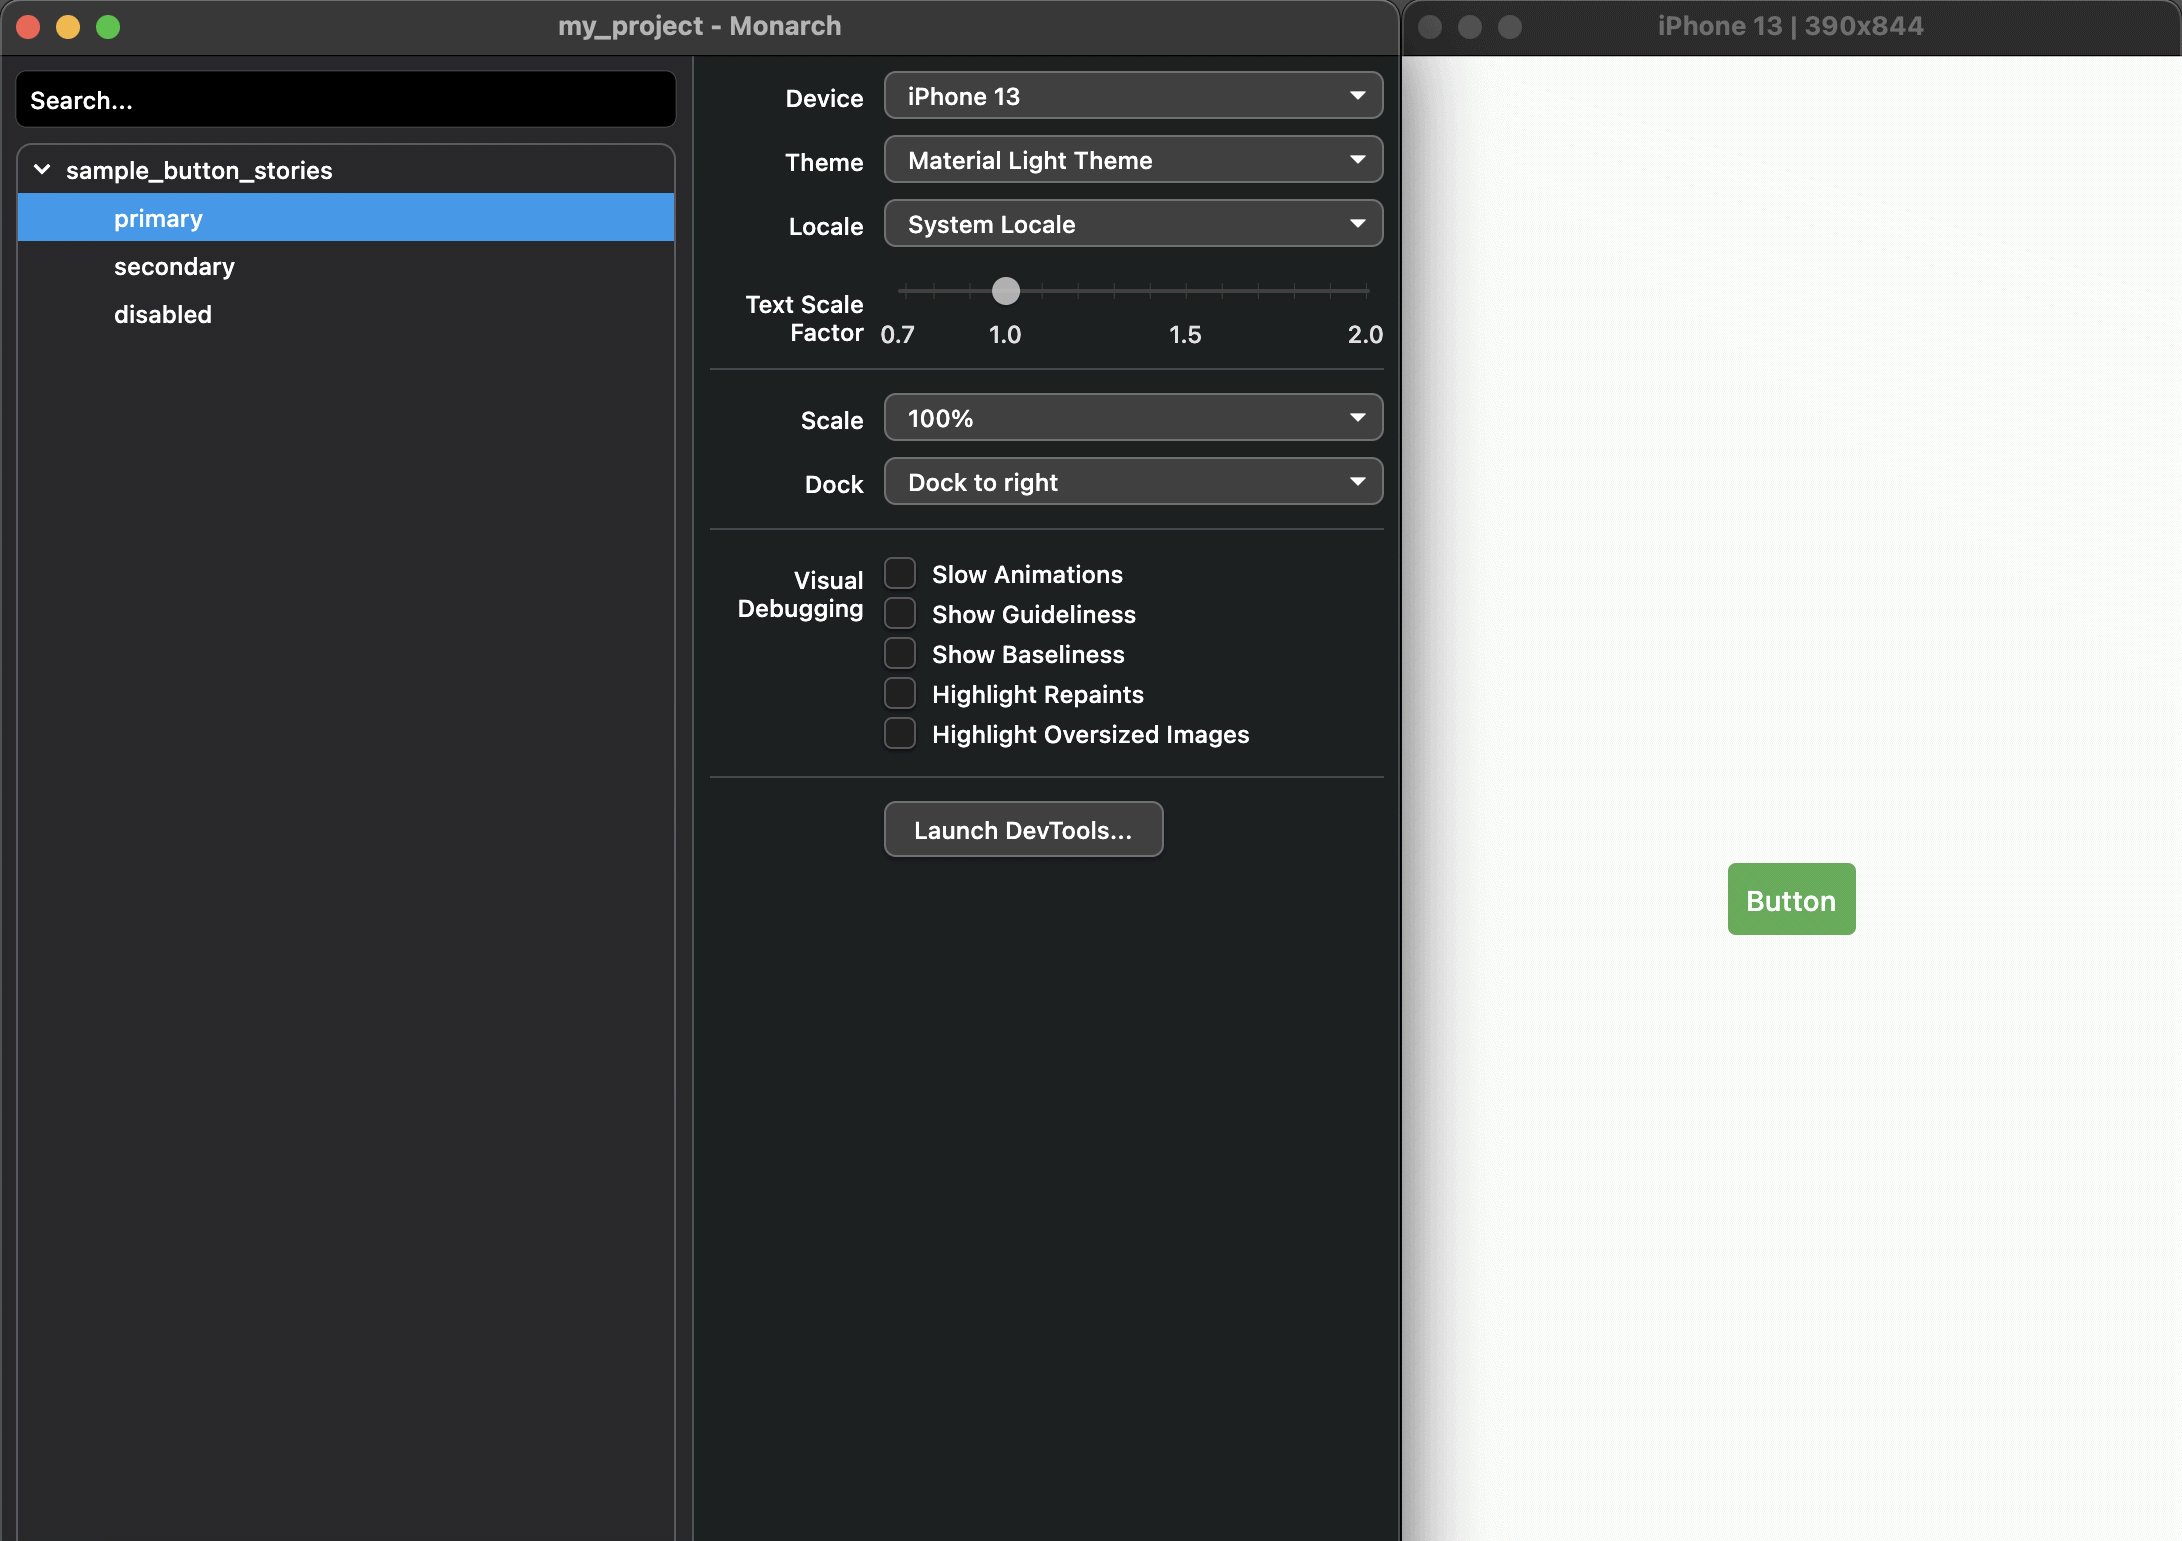
When you select a story on the left window, Monarch will render that story inside the Preview window on the right.
Where to put stories
Monarch will look for stories in dart files that end with *_stories.dart.
You can place stories inside the stories directory or, if you prefer, you can
place them inside your lib directory. The only requirement is that story files
should end in *_stories.dart.
Stories for your own widgets
Let's say your project has a couple of widgets files. One is inside lib
and one inside lib\src.
- my_project
    - lib
        - my_fancy_button.dart
        - src
            - my_fancy_card.dart
To write stories for those widgets, you just need to import them into a
*_stories.dart file, then you can write stories for those widgets.
import 'package:my_project/my_fancy_button.dart';
import 'package:my_project/src/my_fancy_card.dart';

Widget someButton => MyFancyButton(...);
Widget anotherButton => MyFancyButton(...);

Widget someCard => MyFancyCard(...);
Widget anotherCard => MyFancyCard(...);
As you make changes Monarch will reload your stories so you can quickly see them in the Preview window.
Stories for prototypes
You can write stories that use the Flutter widgets directly. It is a good way to prototype new views.
For example, in a file that ends in *_stories.dart, you can add these stories:
Widget foo() => Text('foo', style: TextStyle(fontSize: 50));
Widget bar() => Icon(Icons.pets, size: 50);
Widget foobar() => Center(child: Column(children: [foo(), bar()]));
More
Building from source
If you prefer to build Monarch from source, you can follow this guide which will help you set up your local and build the Monarch source code.
Update your path
Follow these instructions to update your path variable permanently, which will
let you run monarch from any terminal window.
- macOS
- Windows
- Linux
Open your
rcfile, which may be~/.bash_profile,~/.bashrcor~/.zshrc.
Add the following line and change
[PATH_TO_MONARCH]to be the path where you unzipped Monarch:
export PATH="$PATH:[PATH_TO_MONARCH]/monarch/bin"
Run
source ~/. <rc file>to refresh the current window, or open a new terminal window to automatically source the file.
Verify that the
monarch/bindirectory is now in your PATH by running:
echo $PATH
Verify that the
monarchcommand is available by running:
monarch --version
From the Start search bar, enter ‘env’ and select Edit environment variables for your account.
Under User variables, look for an entry called Path, then append the full path of
monarch\binusing;as a separator from existing values.
Open (or create) the
rcfile for your shell. For example, Linux uses the Bash shell by default, so edit$HOME/.bashrc. If you are using a different shell, the file path and filename will be different on your machine.
Add the following line and change
[PATH_TO_MONARCH]to be the path where you unzipped Monarch:
export PATH="$PATH:[PATH_TO_MONARCH]/monarch/bin"
Run
source ~/. <rc file>to refresh the current window, or open a new terminal window to automatically source the file.
Verify that the
monarch/bindirectory is now in your PATH by running:
echo $PATH
Verify that the
monarchcommand is available by running:
monarch --version